Hot Module Replacement(以下简称 HMR)是 webpack 发展至今引入的最令人兴奋的特性之一 ,当你对代码进行修改并保存后,webpack 将对代码重新打包,并将新的模块发送到浏览器端,浏览器通过新的模块替换老的模块,这样在不刷新浏览器的前提下就能够对应用进行更新。
基本实现原理大致这样的,构建
bundle的时候,加入一段HMR runtime的 js 和一段和服务沟通的 js 。文件修改会触发webpack重新构建,服务器通过向浏览器发送更新消息,浏览器通过jsonp拉取更新的模块文件,jsonp回调触发模块热替换逻辑
热更新配置
使用
webpack-dev-server,设置hot属性为true.写模块时,按照以下写法:
    if (module.hot) { //判断是否有热加载
        module.hot.accept('./hmrTest.js', function() { //热加载的模块路径
            console.log('Accepting the updated printMe module!'); //热加载的回调,即发生了模块更新时,执行什么 callback
            printMe();
        })
    }
- 缺点:更新逻辑得自己写。比如要使页面显示的内容生效,需要在回调中写入
document.append(xxx)
react的热加载,使用react-hot-loader
    import { hot } from'react-hot-loader';
        const Record = ()=>{
            ...
        }
        exportdefault hot(module)(Record);
    或

        if (module.hot) {
            module.hot.accept('./App', function () {
                var NextApp = require('./App')
                ReactDOM.render(<NextApp />, rootEl)
            })
        }
实现过程
watch编译过程、devServer推送更新消息到浏览器- 浏览器接收到服务端消息做出响应
- 对模块进行热更新或刷新页面
watch 编译过程、devServer 推送更新消息到浏览器
webpack-dev-server里引用了webpack-dev-middleware,相关的watch逻辑就是在里面实现的
    //webpack-dev-server/lib/Server.js
    setupDevMiddleware() {
        this.middleware = webpackDevMiddleware(
            this.compiler,
            Object.assign({}, this.options, { logLevel: this.log.options.level })
        );
    }
    // webpack-dev-middleware/index.js
    if (!options.lazy) {
        context.watching = compiler.watch(options.watchOptions, (err) => {
        ...
        });
    }
以上代码可以看出,
webpack-dev-middleware是通过调用webpack的api对文件系统watch的。watchOptions如果没有配置的话,会取默认值。值的含义见:https://webpack.js.org/configuration/watch/
- 当文件发生变化时,重新编译输出
bundle.js。devServer下,是没有文件会输出到output.path目录下的,这时webpack是把文件输出到了内存中。webpack中使用的操作内存的库是memory-fs,它是NodeJS原生fs模块内存版(in-memory)的完整功能实现,会将你请求的url映射到对应的内存区域当中,因此读写都比较快
    // webpack-dev-middleware/lib/fs.js
    fileSystem = fs;
    } elseif (isMemoryFs) {
        fileSystem = compiler.outputFileSystem;
    } else {
        fileSystem = new MemoryFileSystem();
        compiler.outputFileSystem = fileSystem;
    }
devServer通知浏览器端文件发生改变,在启动devServer的时候,sockjs在服务端和浏览器端建立了一个webSocket长连接,以便将webpack编译和打包的各个阶段状态告知浏览器,最关键的步骤还是webpack-dev-server调用webpack api监听compile的done事件,当compile完成后,webpack-dev-server通过_sendStatus方法将编译打包后的新模块hash值发送到浏览器端
    // webpack-dev-server/lib/Server.js
    const addHooks = (compiler) => {
        ...
        done.tap('webpack-dev-server', (stats) => {
            this._sendStats(this.sockets, this.getStats(stats));
            this._stats = stats;
        });
    };
    ...
    _sendStats(sockets, stats, force) {
        ...
        this.sockWrite(sockets, 'hash', stats.hash);
        if (stats.errors.length > 0) {
            this.sockWrite(sockets, 'errors', stats.errors);
        } elseif (stats.warnings.length > 0) {
            this.sockWrite(sockets, 'warnings', stats.warnings);
        } else {
            this.sockWrite(sockets, 'ok');
        }
    }
浏览器接收到服务端消息做出响应
- 这里的主要逻辑位于
webpack-dev-server/client-src中,webpack-dev-server修改了webpack配置中的entry属性,在里面添加了webpack-dev-client的代码,这样在最后的bundle.js文件中就会有接收websocket消息的代码了
    //webpack-dev-server/lib/utils/addEntries.js
    let hotEntry;
    if (options.hotOnly) {
        hotEntry = require.resolve('webpack/hot/only-dev-server');
    } elseif (options.hot) {
        hotEntry = require.resolve('webpack/hot/dev-server');
    }
    ...
    if (hotEntry && checkInject(options.injectHot, config, true)) {
        additionalEntries.push(hotEntry);
    }
    config.entry = prependEntry(config.entry || './src', additionalEntries);
- 以上代码可以看出,如果选择了热加载,输出的
bundle.js会包含接收websocket消息的代码。而且 plugin 也会注入一个HotModuleReplacementPlugin,构建过程中热加载相关的逻辑都在这个插件中。这个插件主要处理两部分逻辑:
- 注入
HMR runtime逻辑 - 找到修改的模块,生成一个补丁
js文件和更新描述json文件
先看一张图,看看 websocket 中的消息长什么样子:
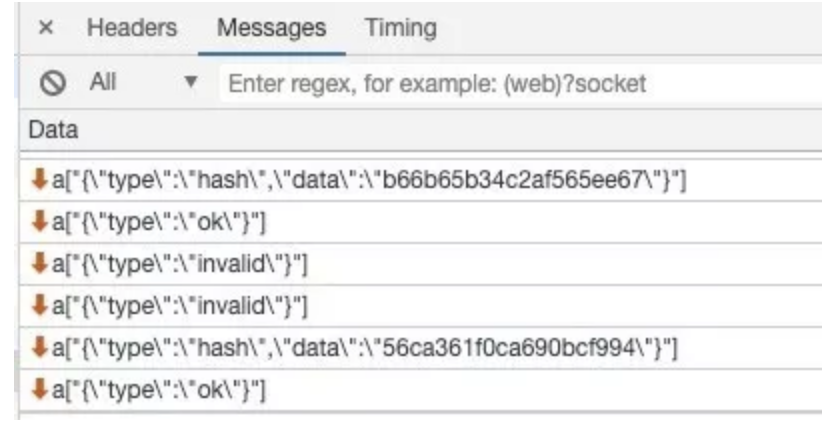
可以看到,接收的消息只有
type和hash两个内容。在client里面的逻辑,他们分别对应不同的处理逻辑:
    // webpack-dev-server/client-src/default/index.js
    hash(hash) {
        status.currentHash = hash;
    },
    ...
    ok() {
            sendMessage('Ok');
        if (options.useWarningOverlay || options.useErrorOverlay) {
            overlay.clear();
        }
        if (options.initial) {
            return (options.initial = false);
        } // eslint-disable-line no-return-assign
        reloadApp(options, status);
    }
- 可以看出,当接收到
type为hash消息后会将hash值暂存起来,当接收到type为ok的消息后对应用执行reload操作,而hash消息是在ok消息之前的。再看看reload里面的处理逻辑:
    // webpack-dev-server/client-src/default/reloadApp.js
    if (hot) {
        ...
        const hotEmitter = require('webpack/hot/emitter');
            hotEmitter.emit('webpackHotUpdate', currentHash);
        if (typeof self !== 'undefined' && self.window) {
            self.postMessage(`webpackHotUpdate${currentHash}`, '*');
        }
    }
- 可以看出,如果配置了模块热更新,就调用
webpack/hot/emitter将最新hash值发送给webpack,然后将控制权交给webpack客户端代码。如果没有配置模块热更新,就进行liveReload的逻辑。webpack/hot/dev-server中会监听webpack-dev-server/client-src发送的webpackHotUpdate消息,然后调用webpack/lib/HotModuleReplacement.runtime中的check方法,检测是否有新的更新:
    // webpack/hot/dev-server.js
    var hotEmitter = require("./emitter");
        hotEmitter.on("webpackHotUpdate", function(currentHash) {
            lastHash = currentHash;
            if (!upToDate() && module.hot.status() === "idle") {
                log("info", "[HMR] Checking for updates on the server...");
                check();
            }
        });

    // webpack/lib/HotModuleReplacement.runtime
        function hotCheck(apply) {
        ...
            return hotDownloadManifest(hotRequestTimeout).then(function(update) {
                ...
                    hotEnsureUpdateChunk(chunkId);
                ...
                return promise;
            });
        }
- 以上代码可以看出,在
check过程中,主要调用了两个方法hotDownloadManifest和hotDownloadUpdateChunk。hotDownloadManifest是通过Ajax向服务器请求十分有更新的文件,如果有就返回对应的文件信息,hotDownloadUpdateChunk是通过Jsonp的方式,请求最新的代码模块。如下图所示:


补充,这两个文件的名称是可以配置的,如果没有配置,则取定义在
WebpackOptionsDefaulter中的默认配置。
    this.set("output.hotUpdateChunkFilename", "[id].[hash].hot-update.js");
    this.set("output.hotUpdateMainFilename", "[hash].hot-update.json");
对模块进行热更新或刷新页面
综上,我们获得了更新的内容。接下来就可以进行更新了。这部分的逻辑在
webpack/lib/HotModuleReplacement.runtime中。
- 首先,更新过的模块,现在都属于
outdated 的模块,所以先找出过期的模块及其依赖:
    //webpack/lib/HotModuleReplacement.runtime
    function getAffectedStuff(updateModuleId) {
      var outdatedModules = [updateModuleId];
      var outdatedDependencies = {};
      ...
      return {
          type: "accepted",
          moduleId: updateModuleId,
          outdatedModules: outdatedModules,
          outdatedDependencies: outdatedDependencies
      };
    }
- 根据调用的
Api信息,对结果进行标注及处理。
    switch (result.type) {
      case"self-declined":
          ...
          break;
      case"declined":
          ...
          break;
      case"unaccepted":
          ...
          break;
      case"accepted":
          if (options.onAccepted) options.onAccepted(result);
          doApply = true;
          break;
      case"disposed":
          if (options.onDisposed) options.onDisposed(result);
          doDispose = true;
          break;
    }
- 从缓存中删除过期的模块和依赖
    // remove module from cache
      delete installedModules[moduleId];

      // when disposing there is no need to call dispose handler
      delete outdatedDependencies[moduleId];

      // remove "parents" references from all children
      for (j = 0; j < module.children.length; j++) {
          ...
      }
      // remove outdated dependency from module children
    var dependency;
    var moduleOutdatedDependencies;
    for (moduleId in outdatedDependencies) {
      ...
    }
- 将新的模块添加到
modules中,当下次调用webpack_require(webpack重写的require方法)方法的时候,就是获取到了新的模块代码了。
    // insert new code
    for (moduleId in appliedUpdate) {
      if (Object.prototype.hasOwnProperty.call(appliedUpdate, moduleId)) {
        modules[moduleId] = appliedUpdate[moduleId];
      }
    }
最后就是错误的兼容了,如果热加载失败,将会刷新浏览器。
阅读全文